
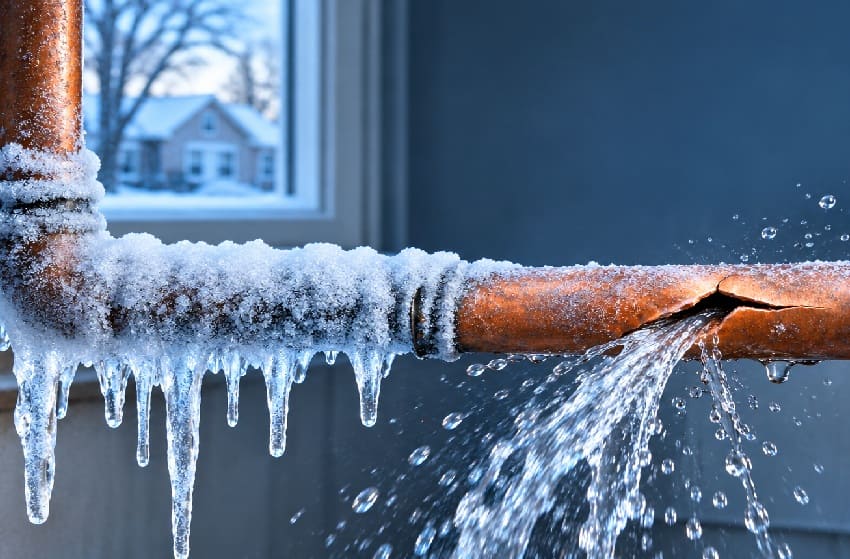
Frozen and Burst Pipes in Michigan: How to Prevent Them and What to Do First
It usually starts with a sound. A faint hiss behind a wall, a drip from a ceiling that was dry last night, or a faucet that coughs and then gives you nothing. In a Michigan winter, that moment can arrive at 2 a.m. during the first real cold snap, and what happens in the next hour can decide whether you’re mopping up a small leak or rebuilding a kitchen ceiling.
Frozen pipes are one of the most common cold-weather disasters in the state. Michigan’s preparedness guidance estimates that they damage a quarter-million homes each winter.[1] The good news is that most of that damage is preventable, and the rest is far less severe when you know what to do first. This guide explains why pipes actually burst (it isn’t what most people assume), how to protect your plumbing before and during a cold snap, what to do in the first hour if a pipe fails, and how insurance and restoration work afterward.
Why Pipes Actually Burst (It’s Not What Most People Think)
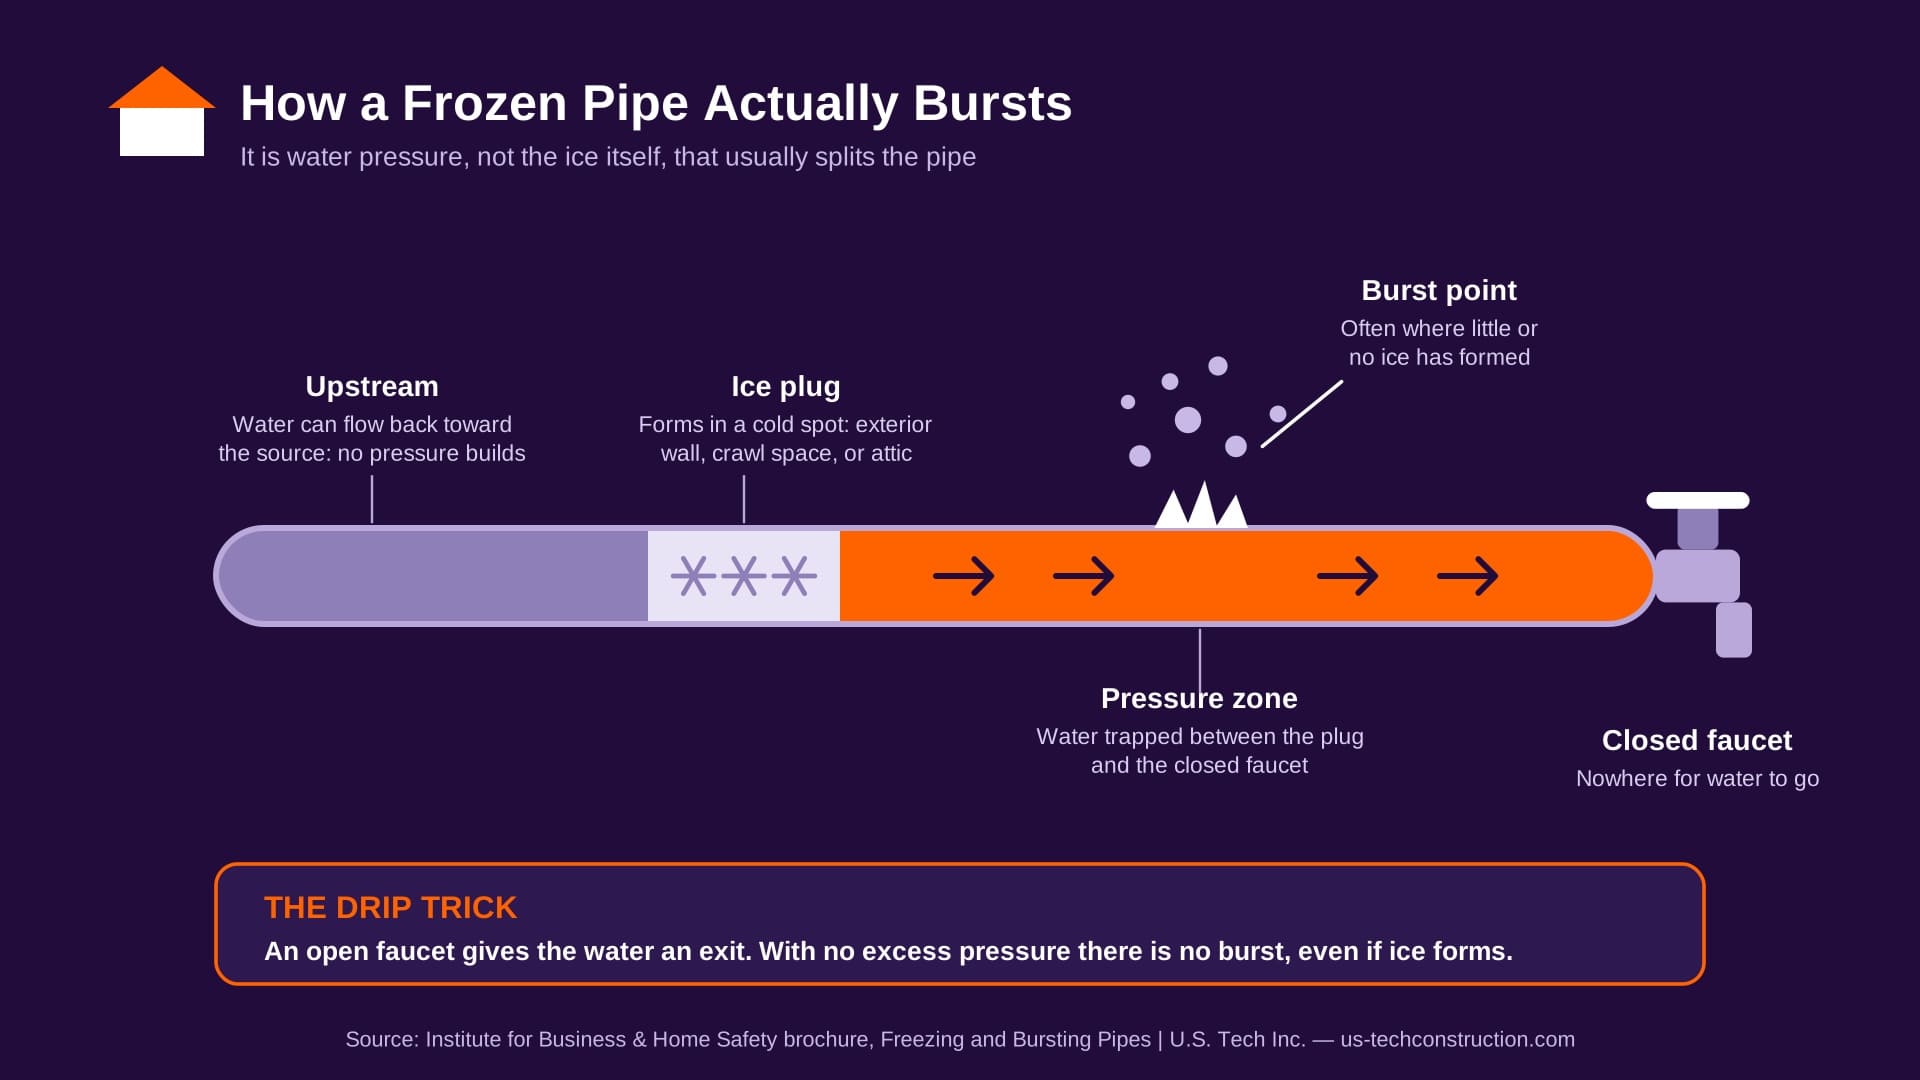
Ask most people why a frozen pipe bursts and they’ll say the ice expanded and cracked it. That’s only part of the story. Water does expand about 9 percent when it freezes,[2] but the damage typically comes from something else: pressure. According to a brochure from the Institute for Business & Home Safety, ice forming in a pipe does not usually cause a break where the blockage is. Instead, after the pipe is completely blocked, continued freezing pushes the remaining water toward a closed faucet, and the pressure between the ice plug and that faucet climbs until the pipe fails.[3] The break usually happens where little or no ice has formed.
That detail explains a lot of homeowner confusion. The burst can show up in a warm part of the house, far from the actual freeze, and sometimes only after things start to thaw. It also explains an old piece of advice that sounds backwards: letting a faucet drip during a hard freeze. The drip doesn’t stop the water from freezing. What it does is give the water somewhere to go. As the IBHS brochure puts it, an open faucet relieves the pressure that builds between the ice and the faucet, and if there’s no excess pressure, there’s no burst pipe, even if the water inside freezes.[3]
Temperature matters too, but not in the way the thermometer suggests. Research at the University of Illinois found that uninsulated pipes in an unconditioned attic began forming ice when the outdoor temperature fell to about 20 degrees Fahrenheit.[3] That’s well below 32, for two reasons: unheated parts of a house run a few degrees warmer than the air outside, and water supercools several degrees below freezing before ice begins to form. The same research found that wind chill can speed up freezing in pipes exposed to moving air, which is why a small gap in an exterior wall can freeze a pipe on a night that a well-sealed home would shrug off.
Where Michigan Pipes Freeze First
Homes in northern climates are generally built with water pipes inside the insulated part of the house, which protects them. That’s one reason many Michigan homes go through winter without trouble. The IBHS brochure notes, though, that extremely cold weather and holes in the building that let cold air reach the pipes can still lead to freezing and bursting.[3] The American Red Cross identifies the most likely trouble spots as pipes against exterior walls and the place where your water service enters the home through the foundation.[4]
In practice, that means the usual suspects are sink plumbing on an exterior wall, pipes in crawl spaces and attics, supply lines in garages, and outdoor spigots with the hose still attached. The IBHS guidance adds a few that homeowners overlook, like holes in an outside wall where cable or phone lines enter, which can give cold air a direct path to nearby pipes.[3] If you’ve remodeled or added onto your house, it’s worth knowing where the plumbing ended up. A kitchen sink moved to an exterior wall or a bathroom added over an unheated space is a new place for the cold to find water.
Before Winter: A One-Weekend Prevention Plan
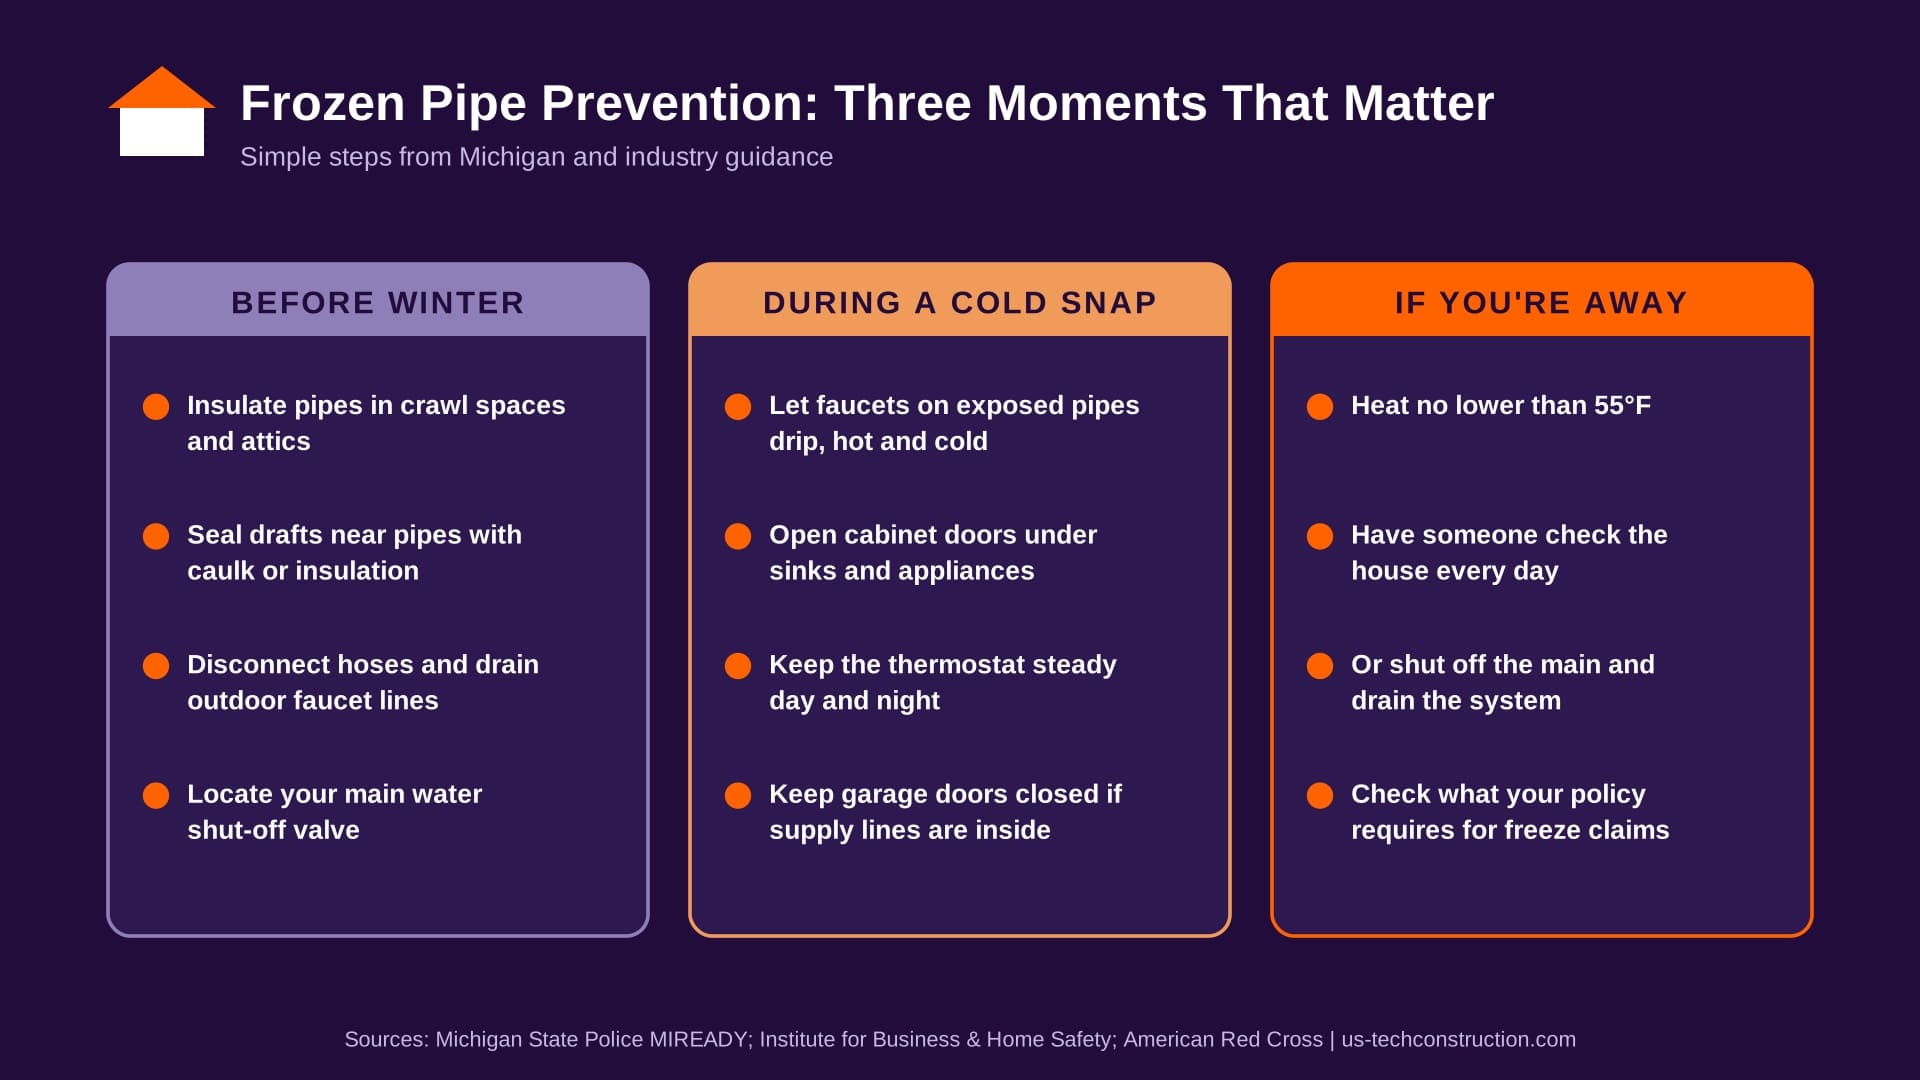
The cheapest protection happens before the cold arrives. The state’s guidance recommends insulating pipes in crawl spaces and attics, which are the most susceptible, and notes that the more insulation you use, the better protected the pipes will be.[1] Foam or fiberglass sleeves are available at hardware stores, and the IBHS brochure points out that specialty suppliers sell sleeves with up to two inches of insulation, which is worth the extra cost for the most exposed runs.[3] The important detail is not to leave gaps that expose bare pipe.
Next, seal the air leaks. The state recommends looking for drafts around electrical wiring, dryer vents, and pipes, and using caulk or insulation to keep cold air out, since a tiny opening can let enough cold air inside to cause a pipe to freeze with a severe enough wind chill.[1] Disconnect garden hoses, and if you have an indoor shut-off valve for outdoor faucets, use it to drain those lines, which reduces the chance of freezing in the short stretch of pipe just inside the house. Keep garage doors closed if there are water supply lines in the garage.[4]
If you use heat tape or heat cables, treat them with respect. The state advises using only products approved by an independent testing organization such as Underwriters Laboratories, and following the manufacturer’s instructions closely.[1] The IBHS brochure recommends cables that conform to UL 2049 and carry a built-in thermostat, since a cable without one has to be plugged in each time and might be forgotten.[3] Finally, locate your main water shut-off valve and make sure everyone in the house knows where it is. In a burst, finding the valve fast matters more than almost anything else.
For pipes that sit in truly bad locations, a plumber may be able to reroute them into protected space. The IBHS brochure notes that this isn’t always practical, but it can be the permanent fix.[3] It’s also something to raise early if you’re planning a kitchen, bathroom, or basement remodel, because the best time to insulate or reroute plumbing is when the walls are already open.
During a Cold Snap: What to Do Tonight
When the forecast drops into the teens, shift from prevention to active protection. Open kitchen and bathroom cabinet doors so warm air can reach the pipes under sinks, and move any household chemicals out of children’s reach first. Let cold water drip from faucets served by exposed pipes; running water through a pipe, even at a trickle, helps prevent freezing, according to the Red Cross guidance shared by Michigan media.[4] The IBHS brochure adds that where both hot and cold lines serve a faucet, both should contribute to the drip, and that if the dripping stops, you should leave the faucet open, because a pipe may have frozen and still needs pressure relief.[3]
Keep the thermostat at the same temperature day and night. Overnight drops are exactly when pipes in exterior walls are most at risk, and Consumer Reports’ advice, as relayed by Fox Weather, is never to set it lower than 55 degrees.[5] A programmable thermostat set to save energy at night can quietly undo your protection on the coldest evening of the year, so check it before the cold arrives.
If You’re Leaving Town
An empty house is where frozen pipes do the most damage, because no one is there to notice. The state’s guidance says to set the thermostat no lower than 55 degrees, ask a friend or neighbor to check the house daily to make sure it’s warm enough, or shut off and drain the water system entirely. One caution from the state: if you have a fire sprinkler system, shutting off the water will deactivate it.[1] The IBHS brochure describes how to drain a system properly: shut off the main valve and open every fixture, both hot and cold, until the water stops running.[3]
This is also where insurance enters the picture, which is covered below. For now, the key point is that leaving heat on or draining the plumbing is often not just good practice but a condition of coverage.
If Your Pipes Freeze: The First Hour
The first sign is usually a faucet that gives you a trickle or nothing at all. Don’t take chances. The state’s advice is to call a plumber if you turn on a faucet and nothing comes out, and if you detect frozen pipes, to turn off the water at the main shut-off valve.[1] Then open the faucet nearest the frozen section so that, as the ice melts, water and pressure have a way out.[4]
If you can find the frozen section and it’s accessible, you can try to thaw it gently. A hair dryer is the recommended tool: start warming the pipe as close to the faucet as possible and work toward the coldest section.[1] Never use a torch or open flame. The Red Cross specifically warns against blowtorches, kerosene or propane heaters, and charcoal stoves,[4] and the IBHS brochure notes that an open flame can damage the pipe and may even start a building fire.[3] Do not use electrical appliances in areas of standing water, because electrocution is possible.[1] If you can’t locate the frozen area, can’t reach it, or can’t thaw it, call a licensed plumber.
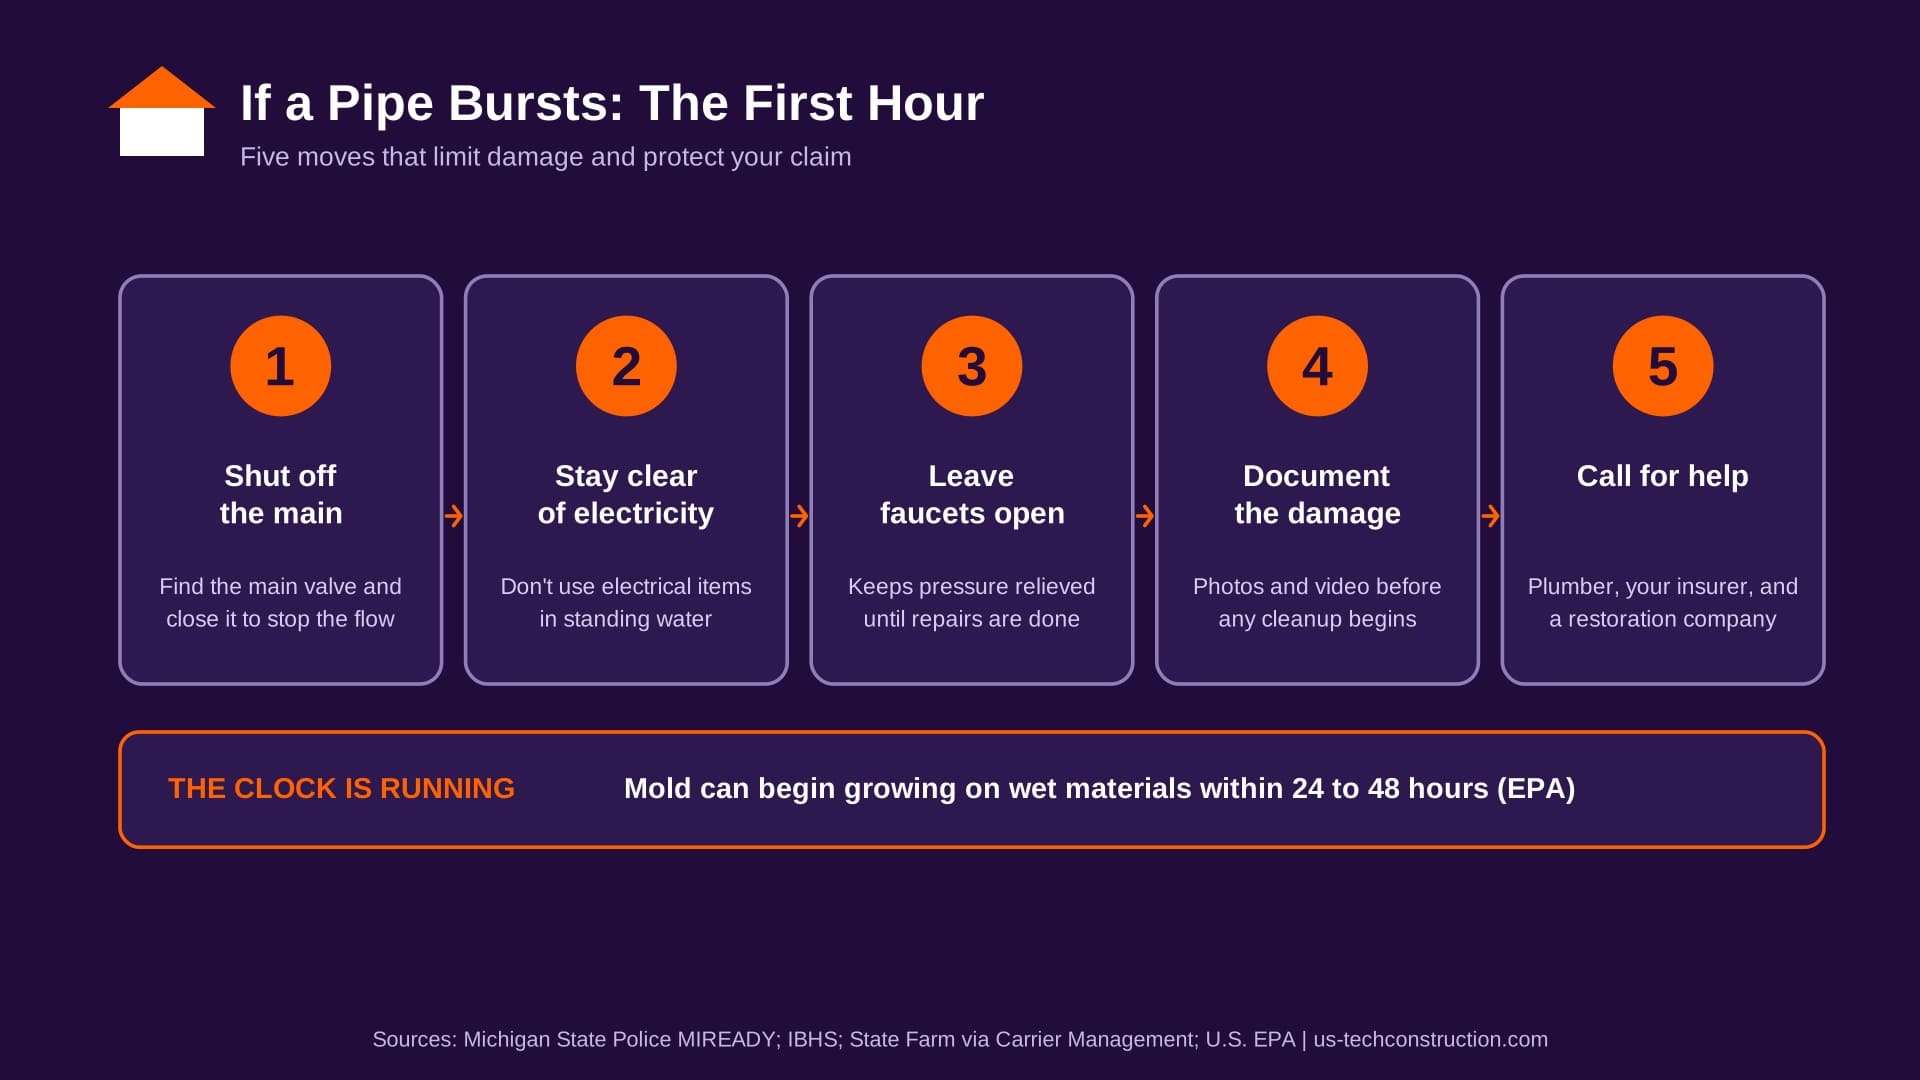
If a pipe has already burst, the order of operations changes. Shut off the main valve first and leave the faucets open until repairs are complete.[3] Stay out of standing water where electrical outlets or appliances are involved.[1] Take photos and video of the damage before you start cleaning, and then make your calls: a plumber, your insurance company, and a restoration company. State Farm’s guidance after a burst is the same: shut off the main, leave faucets open, and contact your insurer.[7]
What Frozen Pipe Damage Costs, and What Insurance Covers
The numbers explain why this matters. Triple-I data show that between 2019 and 2023, about 22.6 percent of home insurance claims involved water damage or freezing, second only to wind and hail, with an average claim of $15,400 and roughly one in 67 insured homeowners filing one each year.[6] Freeze-specific losses can run higher. State Farm reported more than 20,000 freeze-related claims between January 2024 and June 2025, totaling over $628 million in paid losses,[7] and local reporting on the same data put the average payout above $30,000.[8]
Does insurance cover a burst pipe? Generally, yes, with conditions. The Maryland Insurance Administration explains that most policies cover resulting water damage if the homeowner took reasonable steps to keep pipes from freezing, and that damage may not be covered if the insurer determines you neglected the plumbing system by not taking preventive measures.[9] Its consumer advisory adds that policies generally require homeowners to maintain a minimum temperature or shut off the water supply if the home is vacant.[10] Standard policy language works the same way. A common industry form excludes freezing losses unless the insured either maintained heat in the building or shut off the water supply and drained the system.[11]
Michigan policies differ by carrier, so read yours. Search it for the words “freezing,” “vacant,” and “unoccupied,” and ask your agent how the policy defines each one, how long a home can sit empty before coverage changes, and whether the pipe repair itself is covered or only the resulting damage. If a burst happens, the Maryland regulator’s advice that coverage depends on reasonable care is a reminder to document what you did: the heat setting, the shut-off, the timeline. Our post on why DIY cleanup after water or fire damage can cost you more later explains why documentation before cleanup protects your claim.
After the Water Stops: Drying, Mold, and Rebuilding
Stopping the leak is only the first half of the job. Wet drywall, insulation, flooring, and framing keep holding moisture, and the clock is short. The EPA’s mold guidance says mold can begin to grow on wet materials within 24 to 48 hours, and that if a building can’t be dried within that window, you should assume mold growth has occurred.[12] That’s why professionals use moisture meters and thermal imaging to find water inside walls and ceilings that you can’t see, and why a ceiling that looks dry on the surface can still be wet above it.
A burst pipe also tends to touch the rooms people care about most. Water from an upstairs bathroom lands in the kitchen below, and a basement can take on water from above or from a burst line in the ceiling. Once the structure is dry, the rebuild can involve cabinets, flooring, drywall, and sometimes the layout itself. That’s where the restoration and remodeling sides of a project meet, and it’s an advantage to have one team that understands both. Our insurance and restoration team handles the water damage and drying, and the same company can coordinate kitchen remodeling, bathroom remodeling, and basement remodeling when the damage is extensive.
Frequently Asked Questions
At what temperature do pipes freeze?
Water freezes at 32 degrees Fahrenheit, but pipes inside a house usually don’t freeze until the outdoor temperature falls much lower. University of Illinois research found uninsulated pipes in an unheated attic began freezing at about 20 degrees outdoors, and wind or drafts can freeze pipes at higher temperatures.
Should I let my faucets drip in cold weather?
Yes, for pipes in vulnerable locations like exterior walls. A drip doesn’t stop ice from forming, but it relieves the pressure that actually bursts pipes. Let both hot and cold lines drip, and leave the faucet open if the drip stops.
Does homeowners insurance cover a burst frozen pipe?
Often yes for the resulting water damage, provided you took reasonable steps, such as keeping the heat on or draining the system when away. Policies differ, so check your freezing and vacancy language and ask your agent what applies to the pipe repair itself.
Is it safe to thaw a pipe with a hair dryer?
A hair dryer is the recommended tool. Start near the faucet with the faucet open and work toward the coldest section. Never use an open flame, and don’t use electrical appliances while standing in water.
Protect Your Home, and Know Who to Call
Most frozen pipe damage comes down to a few hours and a few decisions. If you’ve had a burst, or you’re not sure whether a wet ceiling or damp wall is more than it looks like, don’t wait for it to dry on its own. As a family-owned remodeling and restoration company in Rochester Hills serving Oakland County since 1992, US Tech Inc. helps homeowners with water damage and the rebuild that follows. Call (248) 729-2411 or contact us to talk through what you’re seeing.
Sources
- Michigan State Police MIREADY: Preventing Frozen Pipes
- Journal of Light Construction: Understanding How Water Pipes Freeze
- Freezing and Bursting Pipes: How Pipes Freeze and Burst, and What to Do to Prevent Damage (Institute for Business & Home Safety brochure, hosted by Multnomah County)
- WDIV Local 4 Detroit: Tips to Help Prevent Pipes From Freezing in the Winter (American Red Cross guidance)
- Fox Weather: 7 Ways to Prevent Frozen Water Pipes in Bitterly Cold Temperatures
- This Old House: Water Damage Statistics (citing Triple-I data)
- Carrier Management: State Farm Frozen Pipe and Winter Water Damage Claims Analysis
- WVIR NBC29: Extreme Cold Can Cause Frozen Pipes and Costly Damage
- Maryland Insurance Administration: Protect Your Pipes
- Maryland Insurance Administration: Consumer Advisory, Frozen Pipes
- PropertyCasualty360: Wrath of Old Man Winter (policy language on freezing exclusions)
- U.S. Environmental Protection Agency: Ten Things You Should Know About Mold







Leave a Reply